
2
 Are you unable to send files more than 25MB in file attachments in your mail in Gmail?. Don't worry, now there is a trick to send files larger than 25MB files in Gmail. Before this trick I think you were depending on file hosting services like MegaUpload.com, Mediafire.com to transfer your large files on Internet. Now sharing files on internet has become easy. Now you can share very large files up to 1GB in email for free. You can share music, videos, movies, software, photo albums etc up to 1GB through email. Even in these modern days you still can't rely on those file hosting services to send your larger files on internet.
Google's email service provider i.e., Gmail and other email service providers are restricting their users by enabling a limitation to the users email accounts that an user can send a maximum of 25MB files in their emails. If you try to send a file larger than 25MB it will give you an error saying "The file exceeds 25MB attachment limit. Sorry".
 So, email users used to send larger files more than 25MB through torrents or by uploading on file hosting services servers and by sharing that URL with the recipient (to whom the file needs to be sent). Then the recipient needs to download those large files from the file hosting servers. The main drawback of using this service is that the sender needs to register with that file hosting service website. Otherwise the email sender used to cut these files into smaller partitions lesser than 25MB and send these files in multiple emails to the recipient. However it will cause problem to both sender and recipient because the sender needs to cut the file into multiple parts and the recipient needs to rejoin these multiple parts into a single file and use. It looks bit horrible but it can't be done by all. In these modern days you can't rely on that old process to send and share your larger files. Here are some steps used to skip verification process during the sign up of Google account. Now you can use this advanced method to send your large files and documents online in email and instant messaging.
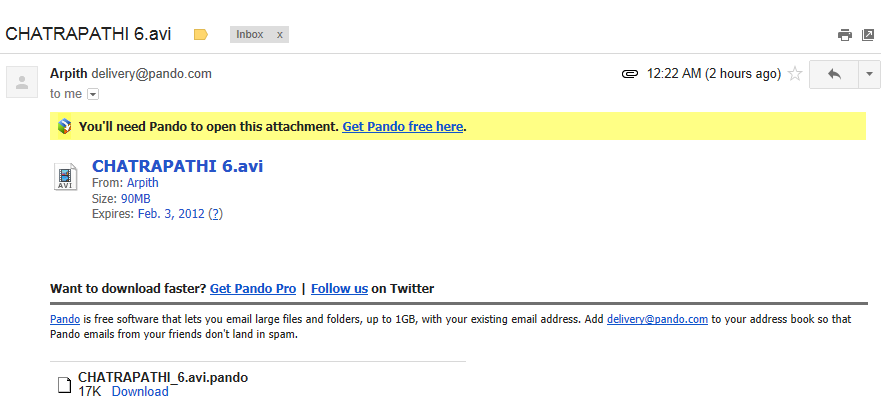
There is a application called "Pando" which helps you in sending and sharing larger files via email. Its helps you in overcoming the defect of uploading larger files and helps you to maintain your privacy from the third party websites. Pando application supports the following operating systems Windows 7, Windows Vista, Windows XP, Mac O S X 10.4 or later. It is a free application as well as paid. In free service you can send up to 1GB file in email and if you upgrade to pro you can send up to 3GB.
Benefits of having Pro account:
Steps to send larger files up to 3GB in file attachments in Gmail:
1. Download and install a free Pando application to your Windows and Mac operating system.[Link].
2. Run the Pando application and now select 'Share new' and select 'email'.
3. In 'to:' mention the recipient email address and now browse the files and folders you want to send to the recipient and fill out the 'Subject', 'Message' and 'From' (the sender's email ID).
4. Click on send to send your mail.
5. The application not only supports Gmail email service but it also supports the other famous email providers like Yahoo! mail, Hotmail and instant messaging services like AOL, Skype, Yahoo Messenger, Outlook and lots more.
6. For using this free service you don't need to register the account on their website.
Snapshot of uploading heavy files.

Snapshot of downloading heavy files.

To use the service even the recipient needs to install this application in his computer. You don't need to worry how to tell the recipient to install this application in his computer the software itself tells to the recipient in your sent email.
 [Click on the images to enlarge].
Share it with your friends and start sending emails with file attachments more than 25MB in Gmail.
 Read More
How to send larger than 25MB file attachments in Gmail
Are you unable to send files more than 25MB in file attachments in your mail in Gmail?. Don't worry, now there is a trick to send files larger than 25MB files in Gmail. Before this trick I think you were depending on file hosting services like MegaUpload.com, Mediafire.com to transfer your large files on Internet. Now sharing files on internet has become easy. Now you can share very large files up to 1GB in email for free. You can share music, videos, movies, software, photo albums etc up to 1GB through email. Even in these modern days you still can't rely on those file hosting services to send your larger files on internet.Google's email service provider i.e., Gmail and other email service providers are restricting their users by enabling a limitation to the users email accounts that an user can send a maximum of 25MB files in their emails. If you try to send a file larger than 25MB it will give you an error saying "The file exceeds 25MB attachment limit. Sorry".

There is a application called "Pando" which helps you in sending and sharing larger files via email. Its helps you in overcoming the defect of uploading larger files and helps you to maintain your privacy from the third party websites. Pando application supports the following operating systems Windows 7, Windows Vista, Windows XP, Mac O S X 10.4 or later. It is a free application as well as paid. In free service you can send up to 1GB file in email and if you upgrade to pro you can send up to 3GB.
Benefits of having Pro account:
- Share bigger files up to 3GB files.
- You won't be disturbed by their irritating advertisements.
- You can secure your files by adding passwords.
Steps to send larger files up to 3GB in file attachments in Gmail:
1. Download and install a free Pando application to your Windows and Mac operating system.[Link].
2. Run the Pando application and now select 'Share new' and select 'email'.
3. In 'to:' mention the recipient email address and now browse the files and folders you want to send to the recipient and fill out the 'Subject', 'Message' and 'From' (the sender's email ID).
4. Click on send to send your mail.
5. The application not only supports Gmail email service but it also supports the other famous email providers like Yahoo! mail, Hotmail and instant messaging services like AOL, Skype, Yahoo Messenger, Outlook and lots more.
6. For using this free service you don't need to register the account on their website.
Snapshot of uploading heavy files.

Snapshot of downloading heavy files.

To use the service even the recipient needs to install this application in his computer. You don't need to worry how to tell the recipient to install this application in his computer the software itself tells to the recipient in your sent email.
Share it with your friends and start sending emails with file attachments more than 25MB in Gmail.
Read More
0
 Generally, you will be having maximum number of files and folders which are useless in your computer. Even in my computer I have lots and lots of files and folders which are useless. To speed up the computer and it to increase your hard drive space and also to improve your PC performance you need to trash i mean delete those useless files. But we can't manage to look up to all those old files and folders which are worthless and manually delete all those files in our busy schedule. Here is a software which will do this work for you within couple of minutes.
The software is named as "Autodelete". You just need to specify the folder which you think is worthless and needs to be trashed it will do this work for you on your behalf. Its saves your time, energy and manual work. You can also save your time in deleting files in your computer by directly right clicking on files this is how you need to add permanently delete option on right click. Autodelete even helps you in removing the junk files and temporary files from your computer. You might be thinking that I have enough space on my hard drive and these temporary might never harm you in any cause. If you think that you are really wrong in your approach at this right moment your junk files and temporary files might not harm you but gradually after couple of months it slowly starts affecting your hard disk drive and slower's your computer speed and performance. I personally recommend you to delete your junk files manually and trash them but in these days no individual is having that much patience and time including myself. To ease your work just download and install this Cyber-D Autodelete software and it will delete all your junk files and temporary files permanently from your computer. The user interface of this software is really pretty easy and you don't need ant other sort of knowledge to use it. You just need to specify a folder which you think is junk in your system and set you own delete options to your needs and run the software after a while you can see all the junk files and folders from your specified folder will be deleted. If you specify a main folder and select to delete all junk files in that main folder the software will examine all sub-folders in that main folder and delete them.
It even doesn't decrease your computer performance while deleting junk files because it doesn't run in background. Even you can enable or disable the software to automatically start up with windows.
Autodelete software supports on operating systems like Windows 7, Windows Vista, Windows XP, Windows 2008, Windows 2000, Windows ME and Windows 98 and might be in Windows 8 but not yet verified because Windows 8 is yet to launch.
How to use Cyber-D Autodelete software to delete junk files from computer:
1. Download and install the Autodelete software from here [Link].
2. Now run the Autodelete software and click on Add folder and specify the folder which you need to check for junk files and delete them automatically. Click on image to enlarge.

3. Now change the software default options to your desired options accoring to your convenience. Default options you find
Delete only these files
2. Date Filters
You can set to the specific number of days and save it. Now the tool will prompt you with Run Autodelete now and click on yes.
Read More
Delete Junk files and folders automatically from Computer
Generally, you will be having maximum number of files and folders which are useless in your computer. Even in my computer I have lots and lots of files and folders which are useless. To speed up the computer and it to increase your hard drive space and also to improve your PC performance you need to trash i mean delete those useless files. But we can't manage to look up to all those old files and folders which are worthless and manually delete all those files in our busy schedule. Here is a software which will do this work for you within couple of minutes.The software is named as "Autodelete". You just need to specify the folder which you think is worthless and needs to be trashed it will do this work for you on your behalf. Its saves your time, energy and manual work. You can also save your time in deleting files in your computer by directly right clicking on files this is how you need to add permanently delete option on right click. Autodelete even helps you in removing the junk files and temporary files from your computer. You might be thinking that I have enough space on my hard drive and these temporary might never harm you in any cause. If you think that you are really wrong in your approach at this right moment your junk files and temporary files might not harm you but gradually after couple of months it slowly starts affecting your hard disk drive and slower's your computer speed and performance. I personally recommend you to delete your junk files manually and trash them but in these days no individual is having that much patience and time including myself. To ease your work just download and install this Cyber-D Autodelete software and it will delete all your junk files and temporary files permanently from your computer. The user interface of this software is really pretty easy and you don't need ant other sort of knowledge to use it. You just need to specify a folder which you think is junk in your system and set you own delete options to your needs and run the software after a while you can see all the junk files and folders from your specified folder will be deleted. If you specify a main folder and select to delete all junk files in that main folder the software will examine all sub-folders in that main folder and delete them.
It even doesn't decrease your computer performance while deleting junk files because it doesn't run in background. Even you can enable or disable the software to automatically start up with windows.
Autodelete software supports on operating systems like Windows 7, Windows Vista, Windows XP, Windows 2008, Windows 2000, Windows ME and Windows 98 and might be in Windows 8 but not yet verified because Windows 8 is yet to launch.
How to use Cyber-D Autodelete software to delete junk files from computer:
1. Download and install the Autodelete software from here [Link].
2. Now run the Autodelete software and click on Add folder and specify the folder which you need to check for junk files and delete them automatically. Click on image to enlarge.

3. Now change the software default options to your desired options accoring to your convenience. Default options you find
- Name Filters
Delete only these files
2. Date Filters
You can set to the specific number of days and save it. Now the tool will prompt you with Run Autodelete now and click on yes.
3. Delete Options
- Send files to trash
- Secure delete files
- Move files to folder
- Include subfolders
- Delete empty folders
You can also see my recent post of how to add an image on taskbar if you haven't read it still. If you need any sort of help in using this software leave me a comment below.
Read More
1
 I was searching for an alternate permanent delete option in my computer for "Shift+Delete". Basically in all Windows series operating systems "Shift+Delete" is the only option to permanently delete a file or folder. If you delete a file or a folder by selecting it and right clicking on it will get deleted but its called a temporary deletion and the folder or file deleted in this way can be restored again. You will find these files which are deleted using this option in recycle bin of your computer. Here is a software after installing it enables you to permanently delete a file or folder by right clicking on it.
This software is supported on operating systems like Windows 7, Windows Vista, Windows XP, Windows 2008, Windows 2000, Windows ME and Windows 98. However the software is worth of few dollars ($) but yet it is a freeware software and is free to use. And in my other post on windows 7 I explained you how to capture desktop screenshot. After installing this software permanent delete option on right click should appear in this way.

Click here to download the .rar file of Software to add Permanently delete option on right click on a file or folder in your Computer:
Download
Steps to follow to install permanently delete option on right click on a file or folder in your Computer:
1. Click on download option above and after downloading the software in compressed .rar archive extract the file using WinRAR.
2. After extracting the file open the folder you will find Sdelete.exe in it.
3. Now copy the Sdelete.exe file and paste it in C drive in the location C:\Windows\System32 then give administrator permission to install that software.
4. Now run anyone among the two registry files permanently delete on right click 1.reg or permanently delete on right click 2.reg and this completes your installation and for the first time you run that software you need to click on agree.
5. Now if you delete any file using permanently delete option on right click there is no chance to recover that file again.
If you didn't feel comfortable in using this option in your computer you can uninstall this software easily on your computer.
Steps to follow to uninstall permanently delete option on right click on a file or folder in your Computer:
1. In the extracted folder you will find Remove permanently delete on right click.reg file if you don't want this software to run on your system then run that .reg file.
2. After running that file you will be promoted with a message asking you to approve to merge that file.
3. You just approve it and once done your computer will be back to normal and now you won't find permanently delete option on right click.
If you feel any sort of difficulties in installing this software in your PC I am here to help you.You can ask me anytime.
Read More
How to add Permanently delete option on right click in Computer
I was searching for an alternate permanent delete option in my computer for "Shift+Delete". Basically in all Windows series operating systems "Shift+Delete" is the only option to permanently delete a file or folder. If you delete a file or a folder by selecting it and right clicking on it will get deleted but its called a temporary deletion and the folder or file deleted in this way can be restored again. You will find these files which are deleted using this option in recycle bin of your computer. Here is a software after installing it enables you to permanently delete a file or folder by right clicking on it. This software is supported on operating systems like Windows 7, Windows Vista, Windows XP, Windows 2008, Windows 2000, Windows ME and Windows 98. However the software is worth of few dollars ($) but yet it is a freeware software and is free to use. And in my other post on windows 7 I explained you how to capture desktop screenshot. After installing this software permanent delete option on right click should appear in this way.
Click here to download the .rar file of Software to add Permanently delete option on right click on a file or folder in your Computer:
Download
Steps to follow to install permanently delete option on right click on a file or folder in your Computer:
1. Click on download option above and after downloading the software in compressed .rar archive extract the file using WinRAR.
2. After extracting the file open the folder you will find Sdelete.exe in it.
3. Now copy the Sdelete.exe file and paste it in C drive in the location C:\Windows\System32 then give administrator permission to install that software.
4. Now run anyone among the two registry files permanently delete on right click 1.reg or permanently delete on right click 2.reg and this completes your installation and for the first time you run that software you need to click on agree.
5. Now if you delete any file using permanently delete option on right click there is no chance to recover that file again.
If you didn't feel comfortable in using this option in your computer you can uninstall this software easily on your computer.
Steps to follow to uninstall permanently delete option on right click on a file or folder in your Computer:
1. In the extracted folder you will find Remove permanently delete on right click.reg file if you don't want this software to run on your system then run that .reg file.
2. After running that file you will be promoted with a message asking you to approve to merge that file.
3. You just approve it and once done your computer will be back to normal and now you won't find permanently delete option on right click.
If you feel any sort of difficulties in installing this software in your PC I am here to help you.You can ask me anytime.
Read More
2
Read More
how to make windows 7 look like mac
Hello everyone
I am currently loving this
Take a look at my pmac

Ok here are the steps to make it look like mine
First download the mac transformation pack here
http://www.winxsoft.com/
Then for the dock which looks like this
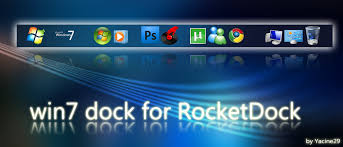
go to rocketdock.com or download object dock from google.com
Then for the mac cursor
Download here
http://www.46palermo.com/blog/mac-os-x-cursors-for-windows-7-vista-xp-easy-installer/
Thanks for watching and have fun with pmac ;)
I am currently loving this
Take a look at my pmac
Ok here are the steps to make it look like mine
First download the mac transformation pack here
http://www.winxsoft.com/
Then for the dock which looks like this
go to rocketdock.com or download object dock from google.com
Then for the mac cursor
Download here
http://www.46palermo.com/blog/mac-os-x-cursors-for-windows-7-vista-xp-easy-installer/
Thanks for watching and have fun with pmac ;)
Read More
0
Read More
Change everything in your windows 7
Hello every one
today I am gonna give u an awesome link for changing almost everything in your windows 7!!
This includes
 Not to say more becoz it includes everything!!!
Download
http://www.thewindowsclub.com/ultimate-windows-customizer
Thanks for watching
today I am gonna give u an awesome link for changing almost everything in your windows 7!!
This includes

Download
http://www.thewindowsclub.com/ultimate-windows-customizer
Thanks for watching
Read More
0
Read More
How to split files into .rar for uploading online
Hi guys

Have you seen people uploading movies in parts ??
It is becoz' people don't have premium accounts
SO when you upload movies or games you upload in parts
This is how to do it
First
select the file(s) you wanna split in to parts
Then right click on em' and click add to archive the following window appears:

Have you seen people uploading movies in parts ??
It is becoz' people don't have premium accounts
SO when you upload movies or games you upload in parts
This is how to do it
First
select the file(s) you wanna split in to parts
Then right click on em' and click add to archive the following window appears:

As you can see at the bottom
"split into volumes"
In that given box below it type the number of files u wanna split it into
Note:U must plan accordingly when u upload for example if the maximum upload of an file is 10mb and your desired file is 100mb u have to split it into 10 volumes
Thanks for seeing
Read More
0
Read More
How to skip file checking NTFS in windows 7
Hi
Do u find this annoying??
 This is like u have to press any key with in ten seconds or u have to wait for years according to my lappy
so today i found a way to skip it.
Disable or Stop Auto CHKDSK During Windows Startup
Go to the following link to learn more
Do u find this annoying??

so today i found a way to skip it.
Disable or Stop Auto CHKDSK During Windows Startup
Go to the following link to learn more
Read More
0
Read More
Windows 8 !!! transformation pack

These are some pics of the skin of windows 8
Do u want to download them ??
http://hameddanger.deviantart.com/art/8-Skin-Pack-1-0-For-7-204297010
Rock n' roll please inform if it does not work enjoy!
Read More
2
Read More
Find Your OS Version

Which Version of Window are you using, Have you tried to know it??
if not just go to
Run-->type winver & enter
Get the Detail of Your Version
Enjoy with this.... :)
Read More
2
Read More
Find Your OS Version
Which Version of Window are you using, Have you tried to know it??
if not just go to
Run-->type winver & enter
Get the Detail of Your Version
Enjoy with this.... :)
Read More
